Upgrading the MINIX NEO Storage M.2 SSD from 250 GB to 1 TB
After spending some time with the MINIX NEO Type C Hub with a built in 250 GB SSD, I can say that I both love this device but I wish it had more storage. Sure 250 GB of storage is fine for most people but I would not categorize myself as “most people”. Officially, MINIX does not support upgrading the SSD in the MINIX NEO Storage Type C hub and to make matters worse, you cannot officially buy a version of the MINIX NEO Storage with capacities greater than 250 GB… With all that said, lets try to unofficially cram a 1 TB M.2 SSD into this thing. Here are the steps
WARNING : Although this modification is very easy to perform, I cannot be held responsible for any damage you cause to yourself or hardware. I will do my best to document my findings in a reproducible way and include a list of all required hardware. These modifications may void your warranty.
Project Overview
- Approximate Time To Complete : 10 Minutes
- Difficulty Level : Easy
- Approximate Cost : $200 (or $250 if you need a set of tools)
Parts List
You will need to have the following parts:
- A 250 GB MINIX NEO Storage Type C Hub
- A 1 TB M.2 SSD (I recommend the Crucial MX500 1TB M.2 but any “B & M Key 2280SS” Drive will work)
- Tools
- 1x 1.0 MM Philips Screwdriver
- 1x J0 Philips Screwdriver
- 1x Metal Case Opener Tool/Pry Tool
- Silicone Work Mat (Optional but recommended)
Tip – The iFixIt Pro Smartphone and Tablet Repair Kit has all of the Tools in one package.
Installation Steps
Backup Your Data
Copy all important data from the MINIX NEO Storage to another hard drive. You should still be able to access the data on the old M.2 SSD by either inserting it into a M.2 reader, Motherboard that supports M.2 drives or by converting the old M.2 Drive into an external hard drive. This backup is in the unlikely event that things go horribly wrong.
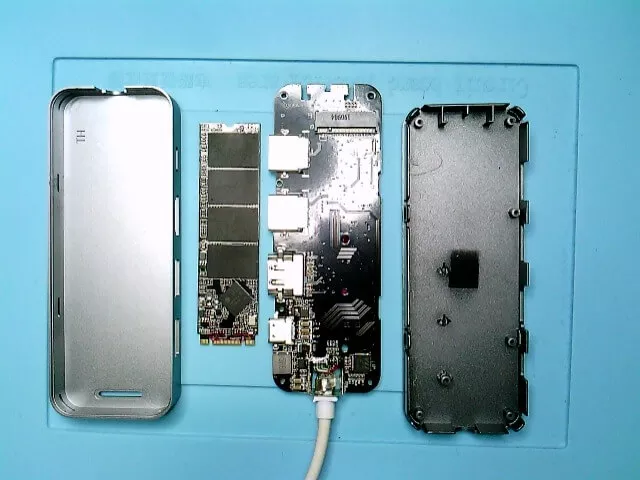
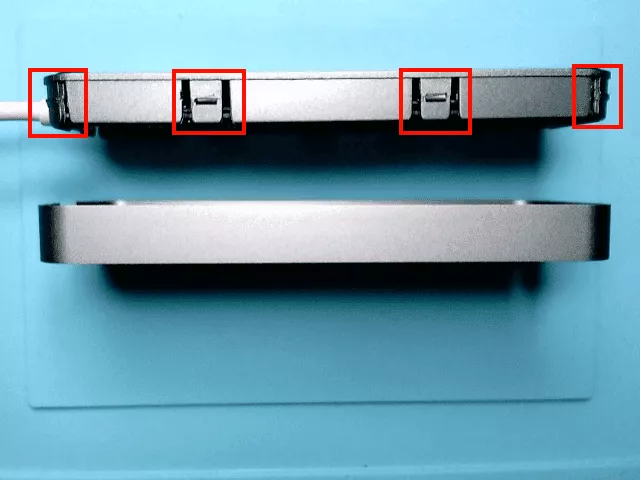
Opening the Case
This case was not designed to be user serviceable so you will need to CAREFULLY pry the case open. This is actually the hardest part of the upgrade. Gently press down on the USB cable until the bottom of the case flexes slightly and use a metal pry tool to gently force the case open. The case top portion of the case is pressure fit and held in place with some retaining clips. Gently apply pressure to each of the retaining clips to remove the top of the case from the bottom of the case. Go slowly and be aware that there are clips on each corner along with the clips on the side of the case.
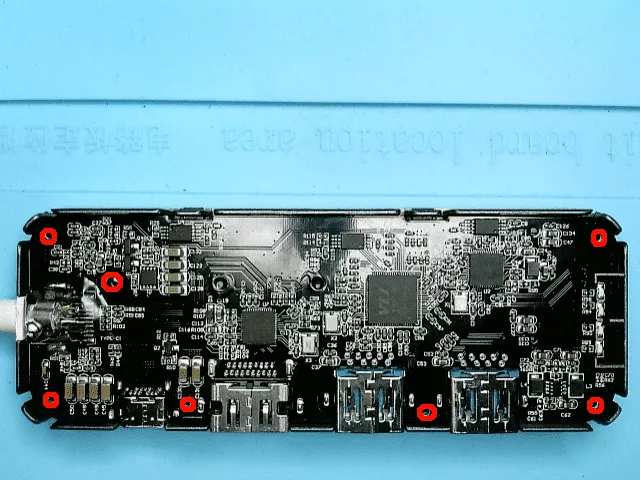
Disassembly
Using your 1.0 MM Philips Screwdriver, remove each of the screws that secure the board to the case (in red). You will also need to use the larger J0 Philips screwdriver to remove the larger screw (which seems to be upside down). Once the screws have been removed, carefully lift the board out of the case and set the case aside.
Removing the old M.2 SSD
On the underside of the board, you will see the factory installed M.2 SSD. The drive is held in place with a red adhesive that can easily be peeled off with your fingernail. Carefully remove the factory M.2 SSD and store it in a anti-static bag.
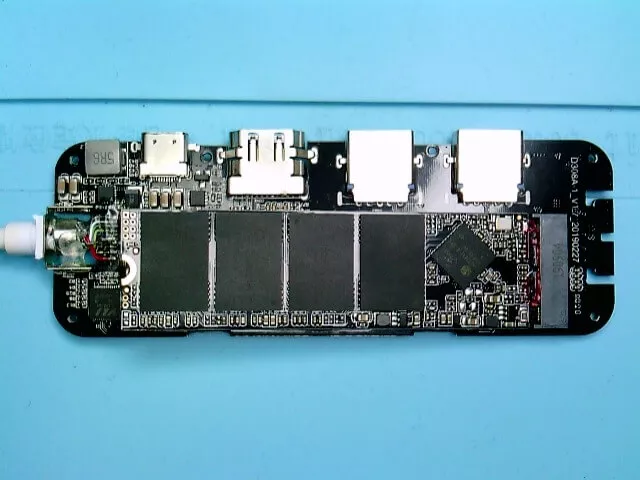
Inserting the new M.2 SSD
Ensure that all of the old adhesive has been removed from the M.2 slot on the board and carefully insert the new M.2 SSD. The M.2 SSD will have a flat side and a side containing the NAND flash chips. The NAND ships should be facing away from the board, do not force it in as the drive will only fit one way.
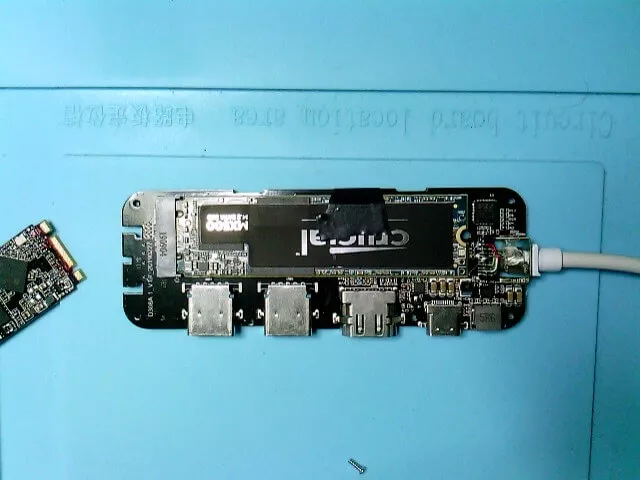
You may want to secure the new drive down with a small amount of electrical tape.
Reassembly
You can now proceed to re-assemble the Type C hub making sure to replace the screws that you removed in the earlier disassembly step an pressure fit the 2 halves of the case.
Finalizing
Go ahead and connect the MINIX NEO Type C hub to your computer, you should be prompted to perform an initial format of the drive which may take a few seconds. Your drive is now ready to be used
As I said in my official review, I LOVE this Type C Hub but with the added storage, I LOVE it even more.