Upgrading the M.2 Solid State Drive on the GPD Pocket MicroPC
If you are a backer of the GPD Pocket MicroPC, you should start getting your shipment details in your email by now. Some people have already received their units and are beginning to experiment with it. One of the major perks of the GPD Pocket MicroPC is that you can easily upgrade the built in hard drive with something a bit larger than the build in 128 GB SSD that comes stock. Here are the instructions.
WARNING : Although this modification is very easy to perform, I cannot be held responsible for any damage you cause to yourself or hardware. I will do my best to document my findings in a reproducible way and include a list of all required hardware. These modifications may void your warranty. Please ensure that you have a backup of all important data stored on the built in SSD.
Project Overview
- Approximate Time To Complete : 10 Minutes
- Difficulty Level : Easy
- Approximate Cost : $75 (or $150 if you need a toolset)
Parts List
You will need to have the following parts:
- A Larger NGFF SATA III M.2 SSD (I strongly recommend the 512 GB 2242 Kingston SSD). It is currently only possible to get drives up to 512 GB in this factor.
- A 16 GB USB Flash Drive (Used to create a recovery disk)
- Tools
- A Set of Precision Philips Screw Drivers with a very fine tip (An eyeglass screwdriver will work best)
- 1x Plastic Case Opening Tool
- Silicone Work Mat (Optional but recommended)
Tip – The iFixIt Pro Smartphone and Tablet Repair Kit has all of the Tools in one package.
Installation Steps
Backup Your Data
Copy any important data from the MicroPC to an external hard drive as these instructions will not cover the process of migrating data. If you followed my instructions to upgrade the MINIX NEO SSD, that will work nicely as a backup location although any external hard drive, USB Flash Drive, Cloud Storage or even the MicroSD card.
Creating a Recovery Disk
Download a recovery image for your desired operating system. You can download the Windows 10 image from GPD’s Website (Note : The videos on the page are not for the Production MicroPC). You can also download a Linux distribution of your choice or even ChromiumOS for GPD (Coming Soon)
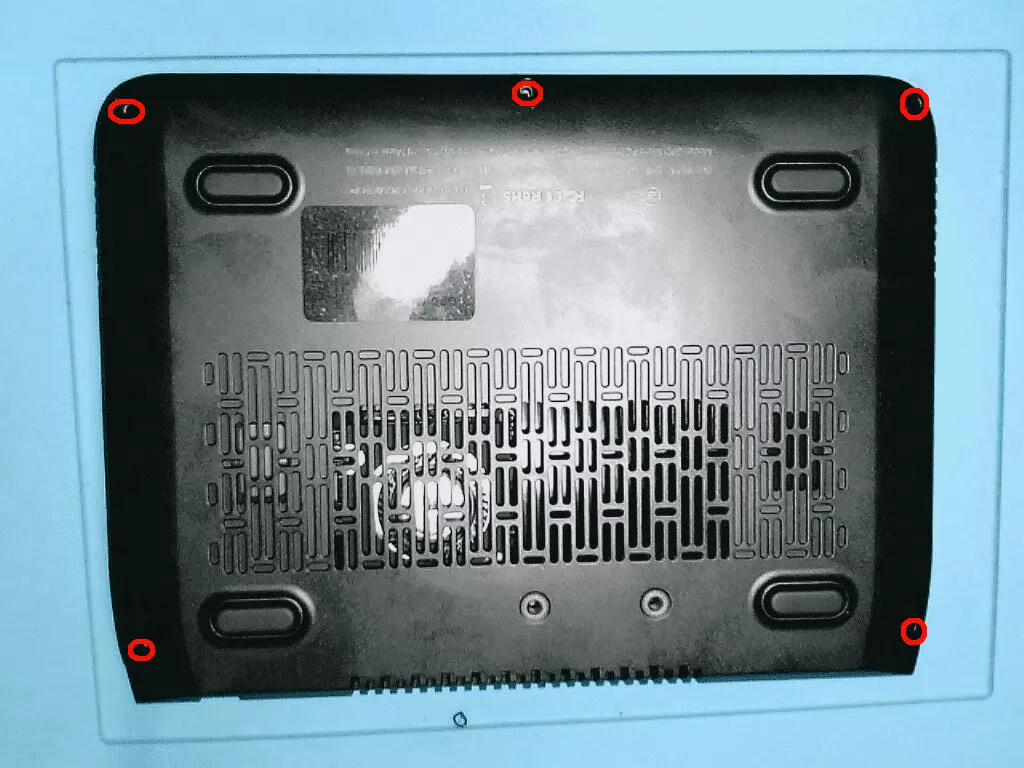
Opening the Case
The case of the GPD Pocket MicroPC is not very difficult to open. You will need to remove 5 microscopic screws on the base of your machine with a very small Phillips Screwdriver. I find a eyeglass screwdriver works best for this. All of the screws are identical so you wont need to keep them in order
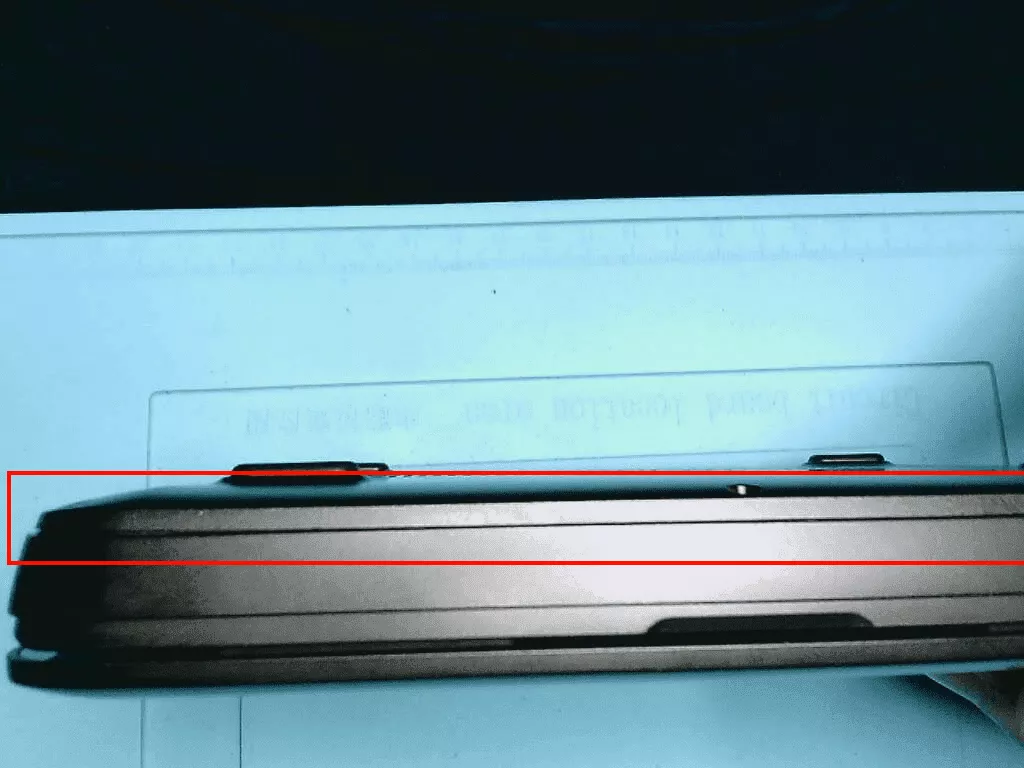
Once the screws are removed, gently use a case opener tool to gently open the case by wedging it between the bottom panel and laptop body. You will need to work slowly starting at one of the front corners and work your way around the unit until the bottom panel comes off.
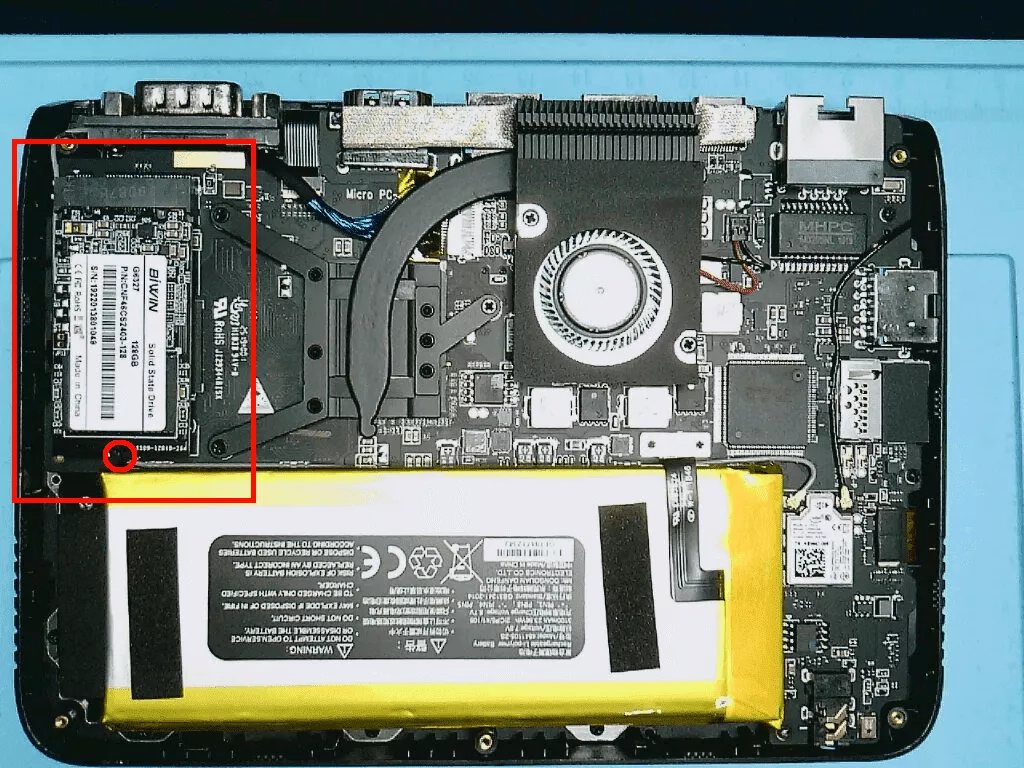
Removing the old M.2 SSD
You will see the factory installed M.2 SSD being held down by a single screw. Remove this screw and place it aside and the factory SSD should easily come off. Store the old SSD in a anti-static plastic bag. While you are here, you should look at the marvel of engineering that GPD went through to pack this insane amount of tech in a device this small while still retaining a user up-gradable SSD.
You can now replace the SSD with a larger SSD such as the 512 GB Kingston SSD. Ensure that you replace the retaining screw that holds your SSD in place.
Reassembly
You can now proceed to re-assemble the GPD MicroPC making sure to replace the screws that you removed in the earlier disassembly step an pressure fit the 2 halves of the case. You should feel your case snap back together before replacing the 5 screws that secure the case.
Finalizing
You can verify the drive installation by accessing the BIOS and viewing the information page. While in the BIOS, you can boot to a recovery disk that you created to install your operating system of choice.
Bonus – Convert your old M.2 SSD Into An External Hard Drive
You can obtain a inexpensive USB Enclosure for M.2 NGFF SSDs and turn your old SSD into an external hard drive.